piggy-bank-hand-with-coin-gift-box-clock-white-background-top-view-1-scaled-1

Simple DIY Tweaks That Boost Your Home’s Value Big Time

Refreshing your property’s look and feel—and boosting its value along the way—doesn’t have to drain your wallet.

Whether you’re gearing up to sell, aiming to attract new tenants, or simply craving a facelift for your space, the good news is that a little effort and creativity can go a long way without breaking the bank.

DIY projects don’t have to feel overwhelming—many upgrades are perfectly doable with some time, patience, and the right know-how. Picture: Getty

Many simple tasks are well within reach for the average renovator, especially when it comes to improving curb appeal. As Cristina Cafasso from Dulux reminds us, “First impressions count, and your street appeal can dramatically boost how a property’s value is perceived.”

Here are seven straightforward DIY updates that pack a serious punch in value.

1. Tackle easy repairs first

Small fixes can make a huge difference. Torn fly screens, squeaky doors, or broken light fittings are all easy to repair yourself, usually without needing to call in the pros.

You can swap out fly screen mesh, lubricate door hinges with WD-40, and replace light fittings with stylish, store-bought options. The same goes for minor annoyances like dripping taps, loose handles, clogged drains, or scuffed walls.

Just be sure to leave the heavy stuff—like electrical, plumbing, roofing, or structural work—to licensed experts.

2. Boost your curb appeal

The old saying about first impressions rings especially true here.

“A fresh coat of paint or a color refresh can work wonders for the exterior of your home,” says Cafasso.

Curb appeal is a combination of many elements—from tidy lawns and gardens to clean driveways, all of which contribute to your home’s welcoming vibe. Picture: Getty

To really up your street cred, spruce up your garden with new or well-maintained plants, upgrade your exterior lighting, and swap out dated house numbers and mailbox for modern alternatives.

Don’t overlook your concrete surfaces, either. “Pressure wash those moldy driveways, give your garage floor a new paint job, or refresh your front steps,” Cafasso recommends.

Dulux’s Concrete & Paving range offers a simple DIY solution to transform dull concrete into something chic and durable. Just clean, prime, and apply the base and topcoats in your favorite shade. The water-based formula is slip-resistant and available in thousands of colors, sure to impress buyers, tenants, and guests alike.

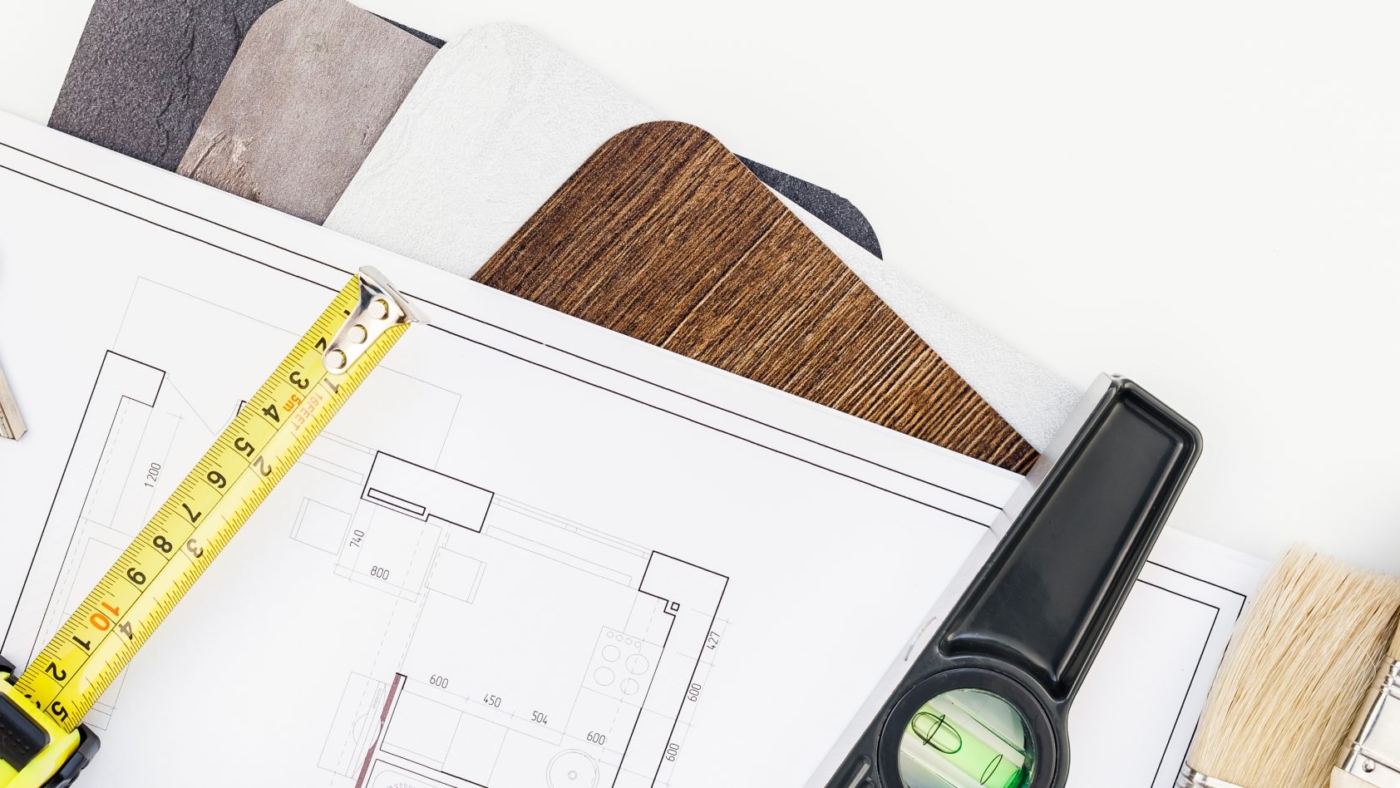
3. Refresh walls and floors

A fresh coat of paint can breathe new life into your interior with minimal fuss.

All you need are quality brushes, rollers, drop sheets, and some trusty old clothes. Choose timeless neutral colors like whites, greys, or beige that appeal broadly and suit a variety of decorating styles.

And while you’re at it, give your floors some love. Rent a steam cleaner for carpets, apply fresh stain to hardwood floors, and re-grout tiles in bathrooms or laundries to make everything feel nearly brand-new.

4. Give your kitchen a facelift

Your kitchen doesn’t need a full renovation to feel revitalized.

Repaint cabinets and drawers using durable, water-based paints like Dulux’s Renovation Range, which can be tinted to any color and works wonders on kitchen surfaces.

Swap out dated knobs and handles for sleek modern options in finishes like chrome or brushed nickel, both of which have wide appeal.

Upgrade old taps for a quick refresh that makes a big difference in style and function.

5. Spruce up the bathroom

Bathrooms are another room where small updates create big impact.

A fresh coat of paint can change the entire vibe—go for calming hues for a spa-like feel or bold shades to make a statement.

Replace old grout to instantly brighten your tiles, and update taps, shower heads, and towel rails with contemporary choices in brushed nickel or matte black.

Don’t forget the vanity mirror—swapping out a cracked or corroded one can transform the space.

6. Revive your outdoor areas

Beyond the front facade, outdoor spaces offer plenty of opportunities to add charm and value.

Tidy the garden or courtyard, re-sand and stain decks and wooden surfaces, add greenery, and ensure outdoor entertaining areas look inviting.

Worn concrete pavers? Dulux Concrete & Paving paint can help turn your yard into an appealing oasis without the expense of full replacement.

If space is limited, vertical gardens offer a lush alternative that packs a visual punch.

“Overhauling outdoor areas can be costly, but this is a budget-friendly and effective way to upgrade your concrete surfaces yourself,” Cafasso explains.

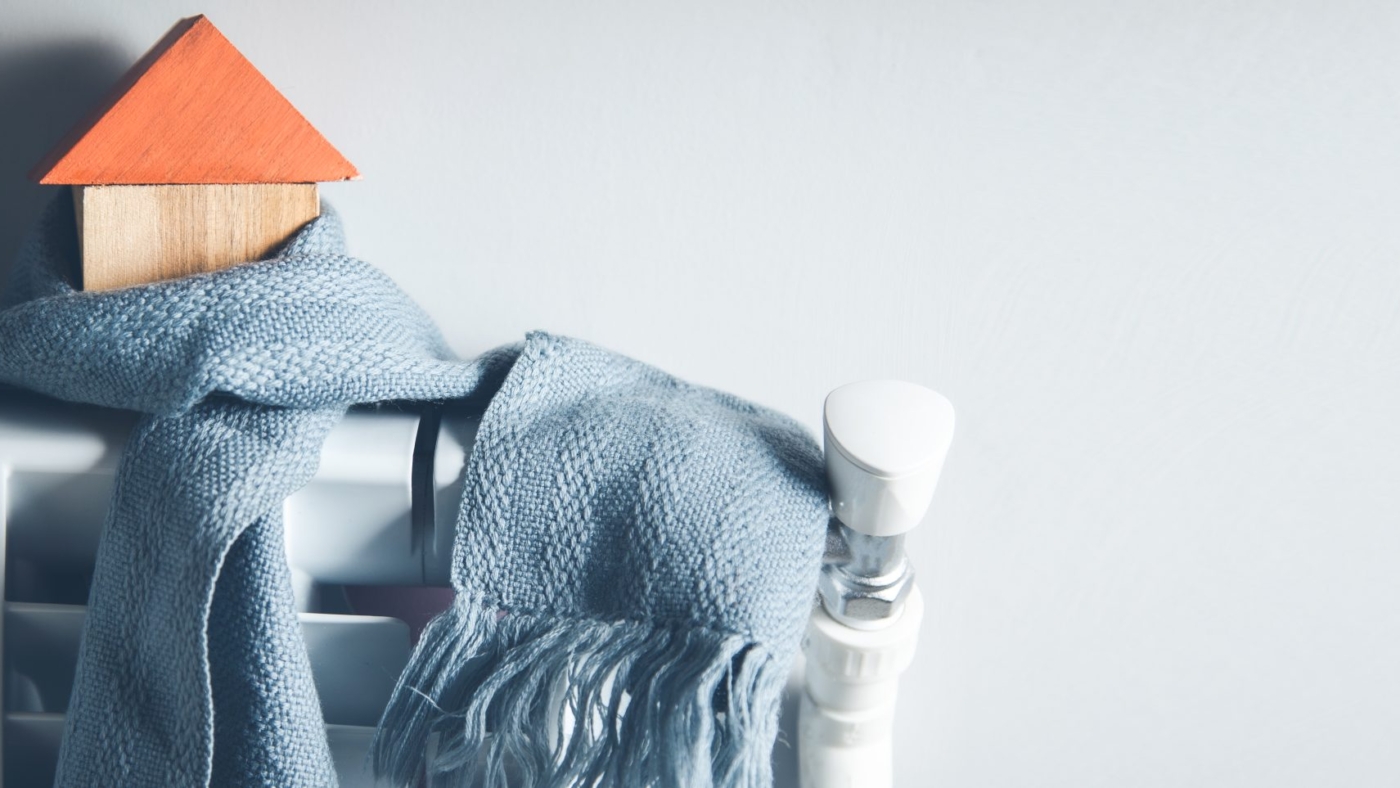
7. Boost your home’s energy efficiency

Sustainability is a hot topic for homeowners, and energy efficiency upgrades not only save money but also add value.

Simple fixes include installing programmable thermostats to optimize heating and cooling, weather-stripping windows and doors to stop drafts, and switching to LED lighting to reduce electricity bills.

Consider insulating window coverings or exterior awnings to keep your home cooler in summer and warmer in winter, lowering your reliance on artificial heating and cooling.

high-angle-view-pen-against-white-background-scaled-1

Simple Upgrades, Stunning Results: Big Impact Made Easy

When we think about home improvements, images of knocking down walls, scaffolding everywhere, a parade of tradespeople flooding in and out, and months of chaos often come to mind. But it doesn’t have to be that way.

Sometimes, the most transformative changes come from smaller, simpler projects that pack a big punch without the stress and mess of a full-scale renovation.

So, if your home is starting to feel a bit tired but you’re not ready for a major overhaul, here are six easy, impactful upgrades you can probably tackle in a weekend.

1. Refresh Your Home with a New Coat of Paint

Few things brighten and modernize a space like a fresh coat of paint. While interior walls are the obvious place to start, don’t overlook painting doors, window frames, skirting boards, or even your fireplace to instantly update their look.

A quick paint job doesn’t have to be time-consuming or break the bank—small changes can make a huge difference. Feeling adventurous? Give your kitchen cabinets a makeover with paint for a fresh vibe without a full remodel.

2. Swap Out Fixtures and Fittings

Often overlooked, items like taps, cabinet handles, doorknobs, and toilet seats can dramatically change the look and feel of your home. The best part? Many of these upgrades are quick and simple DIY tasks.

If you’re updating taps, however, it’s wise to call in a plumber for a smooth installation. You’ll find an incredible range of styles—from sleek matte black faucets to vintage bronze drawer pulls—allowing you to add your own flair easily.

3. Upgrade Your Window Coverings

Windows are a major feature in every room, so refreshing your window treatments can transform a space with minimal effort.

Consider softshades like Luxaflex’s Pirouette Shadings for a clean, sophisticated feel, or plantation shutters for that classic Hamptons look. Already have blinds or shutters? Layer them with sheer curtains for added depth and elegance.

Updated window coverings can completely change a room’s mood and style without the need for heavy renovation.

4. Bring Your Floors Back to Life

Floors take a beating, especially with kids and pets, and can quickly start looking worn or dull.

If you have floorboards, consider sanding and polishing them to restore their natural beauty. For minor scuffs, a good-quality floor polish might do the trick if you’re happy to DIY.

Carpeted? A professional deep clean can lift stains, dust, and dirt to leave your carpets looking fresh and inviting once again.

5. Brighten Up Your Lighting

Lighting sets the tone for any room. If you rely solely on ceiling lights, try adding floor or table lamps with warm white bulbs to create a cozier, more welcoming atmosphere.

In kitchens or workspaces, well-placed task lighting can illuminate dark corners and improve functionality.

Want to add magic outdoors? Install solar-powered uplights, lanterns, or deck lights to give your garden that extra wow factor after dark.

6. Boost Your Home’s Curb Appeal

Make a striking first impression by sprucing up your home’s facade.

A fresh coat of paint on the front door, new house numbers, updated awnings, a stylish letterbox, and some lush plants by the entrance can all work wonders.

Choose a neutral, welcoming look for understated charm or go bold with bright colors and eclectic accents to make your home truly stand out in the neighborhood.

Big changes don’t always require big projects. With these simple, weekend-friendly upgrades, you can breathe new life into your home quickly and enjoyably—no scaffolding or months of mess required.

person-doing-diy-activity-online-content-creation-scaled-1

5 Golden Rules to Keep Your Renovation Running Smoothly

Renovation hiccups are almost inevitable. It’s rare to find a renovation project that hasn’t encountered at least one unexpected detour or delay on its path to completion. The secret to a successful renovation isn’t avoiding problems altogether—it’s about being prepared to navigate the bumps in the road with resilience and grace.

When you embark on a renovation journey, you quickly discover that there is an astonishing variety of obstacles—both tricky and unexpected—that can throw your plans—and your peace of mind—off course. The key is to plan thoroughly, stay organized, and know when to adapt and roll with the punches.

To help you steer clear of costly delays and budget blowouts, Loni Parker, the insightful editor of Adore Home Magazine, shares her expert tips on how to prepare for renovation hiccups. Her advice focuses on practical strategies that will give you the best shot at sticking to your budget, honoring your timeline, and ultimately enjoying a smoother renovation experience.

1. Choose Your Tradespeople Wisely

According to Loni, the most reliable way to find trustworthy tradespeople is through word of mouth. A recommendation from a friend who recently renovated is pure gold.

“If you know someone who’s just been through a renovation, tap into their experience and ask who they worked with,” she says. “Good tradespeople are worth their weight in gold and finding them early can save you from headaches later.”

Loni stresses the importance of building long-term relationships with your tradespeople. “Once you find someone great, hold on to them for life. They’ll go the extra mile for you—and that loyalty often means better pricing and smoother communication.”

She also points out that some companies offer seamless service packages, like Carpet Court, which includes installation with flooring purchases. “If you choose Carpet Court for your flooring, they handle the entire process from start to finish, taking a big worry off your plate.”

2. Map Out Your Timeline Carefully

Planning your timeline is absolutely crucial. Loni advises that you should first finalize your materials and product choices before booking tradespeople. This clarity prevents last-minute surprises.

“Knowing the order tradespeople need to come in is key,” she explains. “Usually, you’ll start with demolition, then the plumber, followed by the electrician for wiring, and so forth. Each step builds on the last.”

Open communication is essential. “Talk to your trades openly—ask if they need to come before or after someone else. This clarity prevents costly overlaps or delays.”

To keep everything organized, Loni recommends using spreadsheets or calendars to track appointments, deliveries, and deadlines. “Having a system makes it easier to see the whole picture and keep your renovation on track.”

3. Always Have Backup Plans Ready

Sometimes, no matter how well you plan, things don’t go as expected. If a tradesperson repeatedly lets you down or misses appointments, it’s time to make a change.

Loni shares from her own experience: “During my bathroom renovation, I had just two weeks before we moved in. If a carpenter bailed on me that morning, I’d immediately find someone else. You can’t afford to wait around because every delay snowballs and throws off the rest of your timeline.”

To avoid such disasters, Loni recommends gathering at least three quotes for every trade. “That way, if your first choice falls through, you’ve got trusted alternatives ready to step in.” She emphasizes keeping detailed records of all quotes and contacts to streamline this process.

4. Build in a Budget Buffer

Unforeseen expenses are the bane of every renovation budget. Unexpected repairs or material shortages can quickly add up.

Loni’s advice? Don’t stretch your budget to the limit from the start. Instead, leave yourself a comfortable buffer—ideally around 10 to 20% of your total budget.

“It’s smart to set aside a contingency fund,” she says. “Even if you’ve been quoted a fixed price, things happen—maybe you uncover termites behind a wall, or a shipment gets delayed. Having extra funds means you won’t be scrambling or forced to cut corners.”

5. Stay Flexible and Keep Moving Forward

When the unexpected hits, Loni’s mantra is simple: keep pushing ahead.

“Don’t let setbacks stop your progress,” she urges. “Ask other tradespeople if they can work around an obstacle or come back later. Flexibility from everyone involved can help keep the project moving.”

Having multiple quotes, backup plans, and a contingency budget gives you the tools to manage surprises with less stress.

“You simply can’t predict everything that will happen,” Loni reminds us. “You might open a wall and find damage you didn’t expect, or a key product could be delayed. Expect that things won’t always run smoothly—and prepare accordingly.”

In the end, renovation is as much about managing the unexpected as it is about design and construction. With smart planning, trusted tradespeople, and a flexible mindset, you can transform potential hiccups into just minor detours on your path to a beautifully renovated home.

young-woman-standing-against-white-background-scaled-1

9 Pro Secrets to Perfect Your Next DIY Paint Job

There’s something truly magical about a fresh coat of paint—it has the power to transform a room instantly, breathing new life and energy into your space. But getting that flawless, professional-looking finish? That can sometimes feel overwhelming. Between the prep work, the elbow grease, and the technique involved, a painting project can quickly seem daunting.

Fear not! With a few practical steps and insider knowledge from the experts, your next DIY paint job can be smooth, enjoyable, and totally successful. Remember, with the right approach, DIY projects can look just as polished as those done by the pros.

Here are nine expert tips to help you nail your next DIY painting project with confidence.

1. Prep Like a Pro

The secret to a stunning paint finish lies in the prep. Before you even open that can, make sure your surface is clean, dry, and free from dust or debris. Sand down rough patches, fill any holes or cracks, and prime your surface to create the perfect base.

Skipping these vital steps might save time upfront but will cost you more in the long run with uneven finishes and premature wear. Take the time to prep properly—it pays off in the final result.

2. Invest in Quality Tools

Your tools matter—big time. Good brushes, rollers, and trays aren’t just luxuries; they’re essentials.

Mark O’Connor, a painting expert at Monarch, warns, “Cheap brushes tend to shed bristles and leave streaks, while low-quality rollers can give you an uneven finish that takes longer to fix.”

High-quality tools pick up and distribute paint evenly, allowing for a smoother, faster finish. They also make your job easier—cutting clean edges and applying paint uniformly. And don’t forget a paint tray with a liner; it keeps things tidy and efficient.

Before you start, take a moment to research the best tools for your project—Monarch’s product finder is a great place to start.

3. Choose the Right Paint for the Job

Not all paints are created equal. Selecting the right paint type is crucial for durability and finish.

“For ceilings, opt for a flat finish,” Mark advises, “as it helps hide imperfections like plaster joints or filler marks.”

Walls typically do well with flat or low-sheen water-based paints, while woodwork needs tougher, more durable paints that withstand wear and tear.

Gone are the days when oil-based enamels were your only option for wood. Nowadays, water-based enamels offer quicker drying times, less odor, and they won’t yellow over time—making them a smart, modern choice.

Choosing the right paint ensures your beautiful finish lasts longer and looks fresh for years to come.

4. Calculate How Much Paint You Need

Running out of paint mid-project is frustrating, but buying too much wastes money. Do your homework.

Measure your space in square meters, then double that to account for two coats—usually a must for a flawless finish.

Remember that one litre of paint covers about 14 to 16 square meters. For example, a standard 3 x 3 meter room with four walls will typically need around 4 litres of paint.

Planning your paint quantity carefully will save you last-minute runs to the store.

5. Master Your Tools

How you use your brushes and rollers can make all the difference.

Before painting, soak brushes in water for 10 minutes and shake off excess moisture. For rollers, run them under the tap for a couple of minutes, squeeze out water, then roll them on a clean wall until dry.

When loading paint, only dip the brush about an inch deep—too much paint will drip and dry unevenly.

For rollers, roll them in the paint tray repeatedly until they are evenly coated.

This small prep helps ensure an even application and a flawless finish.

6. Protect Floors and Furniture

Painting can be messy, so shield your floors and furniture before you start.

Use drop sheets or plastic sheeting, and move furniture out if you can. If not, cover it with plastic or old sheets to keep paint splatters at bay.

Taking this step means less cleanup and less heartache when an accidental drip happens.

7. Slow Down and Take Your Time

Rushing is the enemy of a beautiful paint job. Mark warns, “Hurrying leads to sloppy work and ultimately costs more time and money fixing mistakes.”

Patience pays off—invest time in prepping well and applying paint carefully. The result will be a finish you can be proud of for years.

8. Clean Your Tools Properly

Don’t skimp on cleaning. Thoroughly rinse brushes and rollers in warm, soapy water until all paint is gone. Let them dry completely before storing to keep them in good condition for your next project.

Taking care of your tools means they’ll perform better and last longer.

9. Enjoy the Process

Painting can be surprisingly therapeutic. Put on your favorite music or podcast, invite a friend to help, and enjoy the transformation unfolding before your eyes.

Take pride in your work—you’re creating something beautiful with your own hands. Don’t hesitate to show off your freshly painted space!

With these expert tips in hand, your next DIY paint project is set for success. Roll up your sleeves, breathe in that fresh paint smell, and get ready to transform your space like a pro!

still-life-home-comfort-with-cup-tea-scaled-1

12 Must-Try DIY Projects That Every Homeowner Will Love

Transitioning from renting to owning your own home is a thrilling milestone, brimming with new possibilities—and, let’s be honest, a pretty long to-do list. But don’t worry, there are plenty of simple, budget-friendly ways to make your new house feel like your very own sanctuary.

Homeownership means the freedom to shape your space exactly how you want it, reflecting your unique style and lifestyle. Even if your renovation budget is tight after the big move, you can still make meaningful upgrades that pack a punch without breaking the bank.

Whether you’re a seasoned DIY pro or just ready to roll up your sleeves and learn, these easy projects will help you turn your new house into a home filled with personality and charm.

1. Refresh with a fresh coat of paint

Painting is hands down one of the quickest and most transformative ways to breathe new life into any room. Choose colours that brighten your space or create a cozy vibe. Don’t stop at walls—consider painting exposed brick, timber panels, or even those tired kitchen tiles for an unexpected pop.

2. Modernise your lighting

Lighting completely changes a room’s atmosphere. Swap out old fixtures for sleek, modern designs that suit your aesthetic—and while you’re at it, switch to energy-efficient LED bulbs that last longer and cut down on your power bill.

3. Swap cabinet and door hardware

Small changes can have a big impact. Updating knobs and handles on kitchen cabinets, bathroom vanities, and doors is an easy way to freshen up your home’s look without heavy lifting.

4. Embrace smart home tech

Smart devices like thermostats, light bulbs, doorbells, and security systems are easy to install and make your life easier. Plus, managing them from your phone adds convenience and peace of mind.

5. Raise the curtain

If you have the budget, replace old blinds or curtains with new ones that enhance your home’s natural light and match your style. Confident DIYers can order made-to-measure window treatments online and hang them yourself, saving both money and time.

6. Upgrade your mailbox

Don’t underestimate the power of curb appeal. A stylish, new mailbox that complements your home’s exterior can make a surprisingly big statement—and it’s a project that’s quick and affordable.

7. Bring the outdoors in with landscaping

Whether you have a sprawling yard or just a small balcony, planting flowers, shrubs, or even vegetables can add charm and give you a rewarding hobby. For limited space, try potted plants or a vertical garden to maximize greenery.

8. Layer in area rugs

If your floors need some love or don’t quite match your style, area rugs are a lifesaver. They hide scratches, cover outdated tiles, and add warmth and comfort—plus, they’re easy to swap out when you’re ready for a change.

9. Freshen up with caulk and grout

Give your bathroom or kitchen a quick facelift by re-caulking around tubs and sinks and re-grouting tiles. It’s a simple task that instantly makes surfaces look cleaner and more polished.

10. Swap light switch plates

Replacing worn or discoloured switch plates is a small detail that can refresh a room’s appearance and is super simple to do.

11. Deep clean for instant renewal

A deep clean can feel like a mini-renovation. Rent a carpet cleaner or power washer to refresh carpets, rugs, or your home’s exterior—and enjoy that fresh, new-home feeling.

12. Add life with indoor plants

Indoor plants are an effortless way to brighten any room and improve air quality. Choose low-maintenance varieties like pothos, snake plants, or succulents that thrive in most environments and bring a touch of nature inside.

two-realistic-pink-donuts-ground-with-marshmallows-scaled-1

In a Flash: Marjory Sweet Unfiltered

When I first cracked open Marjory Sweet’s latest book—over breakfast, of course—I found myself unexpectedly moved to tears. This isn’t just a cookbook; it’s a lyrical celebration of the most cherished meal of the day. Equal parts poetry and recipe collection, the book is filled with beautiful, evocative odes to breakfast and stunning photographic snapshots that capture its quiet magic. Holding it in your hands, you realize it’s a work of art—an object as thoughtfully crafted and lovingly composed as the recipes it contains. This, I’ve come to understand, is the hallmark of everything Marjory creates: whether it’s her recipe books, her lovingly restored rental homes, or the delicate pastries she bakes, each one is a testament to her unique blend of artistry and heart.

Marjory describes herself simply as “a farmer, cook, and writer—in that order.” She shares a little of her journey with us: “I was born and raised along the rugged coast of Maine. After a brief period working with artists in New York City and a transformative year and a bit in Italy, I spent 11 years in New Mexico managing small organic vegetable farms. Cooking—and writing about cooking—grew naturally out of that farm life.” She pauses, then smiles, “If you take all of that experience and fold it together like layers in a perfect pie, you arrive at where I am now: back in Maine, cooking food every day at Cafe Grazie, which I co-own and operate with my business partner, Marcy Taubes.” And her newest book, Romantic Chicken, has just been released—exclusively available at The Post Supply in Maine, a beloved local favorite and Remodelista pick.

Today, Marjory shares a glimpse into her world: her dream home (“I’ve been a Judd fanatic for years,” she confesses), her biggest kitchen pet peeve, and the surprisingly “sneakily neutral” color she’s currently loving. Plus, she’s kindly included some mouthwatering photos of summer cakes that look almost too good to eat.

You’re invited to dinner. What’s your go-to gift?
“Candles, always,” Marjory says without hesitation. “Here in midcoast Maine, Danica candles are a local favorite—they come in a dazzling array of colors and sizes. But even more special are the hand-dipped, delicately twisted candles made by my friend Kate, also local. They’re wonderfully fragrant and make the perfect little gift to accompany a bouquet of fresh flowers—simple, thoughtful, and just right.”

What’s on your bedside table?
Marjory paints a vivid picture: “Several pairs of Ursa Major earrings I’ve remembered to remove before drifting off to sleep, my trusty 64-ounce water bottle—which I literally can’t live without—and a towering stack of books I’m both reading and ‘reading’ in a more leisurely way. Right now, that includes Circe, which I’m nearly finished with; The Magic Mountain, which I’m actively tackling but finding a bit of a slog; and A Manual for Cleaning Women by Lucia Berlin, whose short stories are among my favorites. I dip into those intermittently alongside the other two.” She laughs softly. “Oh, and I never forget my coffee cup—this morning’s was a vintage Snoopy mug that reads, ‘At times life is pure joy!’ I abandoned it right there on my nightstand after the last comforting sip.”

house-model-with-scarf-home-scaled-1

8 Genius Hacks to Breeze Through Your Home Renovation

Tackling a home renovation might just rank alongside decluttering your garage or assembling flat-pack furniture as one of the most daunting tasks you can face at home. But it doesn’t have to be that way. With a clear plan, a solid understanding of your goals, and the right help on your side, your renovation can unfold smoothly, efficiently, and with minimal stress.

Here are eight game-changing strategies to help you navigate your renovation with confidence—and keep your sanity (and relationships) intact along the way.

1. Take a Bird’s-Eye View

Before diving into the nuts and bolts, take a step back and adopt a strategic approach. Don’t fly by the seat of your pants—instead, craft a comprehensive plan that includes budgeting, research, timelines, and a clear roadmap.

This foundational stage is crucial. Laying the right groundwork not only shapes the success of your renovation but also sets the tone for how much patience you’ll need throughout the process.

Rather than breaking the project down room-by-room, try looking at it holistically. A big-picture view ensures cohesion and flow across your entire home.

“This approach helps maintain a consistent theme throughout the space,” says Vera Meharg of Luxaflex. “When your products and color palettes work together seamlessly, your renovation looks professional, thoughtful, and truly pulled together.”

2. Make Your Space Livable—or Find a Temporary One

If your renovation is extensive, chances are you’ll need to create—or find—a livable space during construction.

As you pack up your home, set aside a few essential boxes filled with pots, pans, toiletries, portable cookers, electronics, and anything else you’ll need to live comfortably while the work is underway.

Planning for this “in-between” period early will save you headaches and keep your day-to-day life running smoothly.

3. Try Before You Buy

Choosing paint colors and furnishings might seem as simple as picking your favorite shade from the store shelf. But colors and textures can look very different once they’re in your actual home.

Avoid costly mistakes by testing samples beforehand. Grab paint swatches, test them on your walls, and see how they look in varying light throughout the day.

“Natural and artificial lighting can dramatically alter colors,” Vera explains. “Testing samples in different lighting conditions ensures you won’t be surprised later—and that you’ll love your choices long-term.”

The same goes for fabrics and upholstery—ask for samples to take home and see how they pair with your existing décor before making a final decision.

4. Decide on Finishes Early

While door handles, towel racks, and window coverings might seem like finishing touches, they deserve attention from the start.

These elements can have a significant impact on the overall look and function of your space—and some, like motorized window treatments, require early planning for wiring and installation.

“Discuss your needs upfront,” Vera advises. “If you want automated blinds, you’ll need power outlets placed strategically. You might also consider recessing window coverings behind bulkheads for a sleek, modern aesthetic.”

5. Prioritize Function Over Form

When selecting design features and materials, remember the age-old adage: form follows function.

Sure, timber blinds might look stunning in your organic-modern bathroom, but they can warp or attract mold in humid environments.

“It’s vital to choose materials that not only look good but also stand up to the conditions,” Vera says. “Classic window coverings, for example, resist moisture and won’t blister, peel, or fade—making them perfect for steamy bathrooms.”

Balancing beauty with practicality ensures your renovation stands the test of time.

6. Get Your Garbage Game On Point

Renovations generate a lot of waste—from demolition debris to packaging and old fixtures. Managing this waste is part of your responsibility.

Create a waste disposal plan early on. Hiring a skip bin is a popular solution—it keeps all rubbish contained and makes disposal easier when your project wraps.

To be kinder to the environment, look for skip hire companies that recycle materials or consider reusing bricks, tiles, and other salvageable items in your renovation.

7. Don’t Hesitate to Call in the Pros

Even the most enthusiastic DIYers should know when to seek professional help.

Certain tasks—like electrical work and plumbing—require licensed experts by law. Others, like structural changes, flooring, tiling, or carpentry, often demand skills that only pros can deliver efficiently and safely.

For example, motorizing your blinds will require an electrician to handle power supply installations, and a skilled carpenter to hide bulkheads for a clean finish.

Investing in professionals where it counts will save time, money, and stress in the long run.

8. Think Custom for a Perfect Fit

If you can’t find the exact light fixture, paint color, bathroom tap, or window covering you envision, remember: custom-made solutions exist for nearly everything.

Custom products not only fit your space flawlessly but often provide superior durability and performance—meaning fewer replacements and better harmony with your home’s aesthetic.

“Custom window coverings, in particular, can be tailored precisely to your window dimensions,” Vera explains. “This avoids bulky fittings, maximizes energy efficiency by reducing drafts, and can accommodate unique window shapes or skylights.”

Additionally, custom solutions let you specify functions like light-blocking or filtering options, often unavailable in standard off-the-shelf products.

With these eight essential tips, your home renovation is destined to be a smoother, smarter, and more satisfying experience. Take charge, plan well, and watch your dream home come to life—without the drama.

vertical-shot-handsome-businessman-young-office-with-pet-scaled-1

5 Simple Upgrades That Instantly Boost Your Home’s Charm

If your home is craving a makeover—or even just a little facelift—there are plenty of simple DIY upgrades that can completely transform your space with minimal fuss.

Sometimes, it’s the straightforward yet impactful changes that add the most appeal and give your home that fresh, revitalized feel. Plus, by rolling up your sleeves and doing a bit of hands-on work, you’ll get to enjoy the immediate satisfaction of seeing your efforts come to life.

Here are five easy places to start that will make a big difference:

1. Refresh Your Front Door

Think of your front door as the smile of your home—it’s the very first impression visitors get, so it’s worth making it memorable.

A bold, fresh coat of paint on your front door can instantly boost curb appeal and create a warm, inviting entrance.

But the secret to a flawless finish? Preparation and quality. Experts agree that rushing the job or skimping on materials only leads to frustration down the road.

For the best results, start by thoroughly cleaning and filling any holes or cracks. Use premium tools—like a 4mm Ultra Microfibre roller paired with high-quality paint—for a smooth, professional finish.

Monarch’s painting expert, Mark O’Connor, highlights the difference good tools make: “DIYers are always amazed how premium brushes and rollers transform their paint jobs. Plus, they make the process quicker, easier, and more enjoyable.”

2. Give Your Walls a Fresh Look

Nothing refreshes a room like a fresh coat of paint on the walls.

To get a smooth, professional result, grab a paint kit specifically designed for walls. Before you dive in, patch up dents and scratches and cover your floors with a good drop sheet to keep everything tidy.

Whether you choose a color that complements your furniture or opt for a trendy hue to give your space a modern lift, the right prep work is key.

Remember to clean, patch, and prime your walls before painting—that’s what takes your DIY from good to gorgeous.

3. Upgrade Your Bathroom with Color

Bathrooms offer a perfect canvas for subtle or bold transformations, and paint can work wonders here.

Create a tranquil, spa-like vibe with soft, soothing tones—or make a statement with a daring color.

For smaller touch-ups, a Walls, Doors, and Trim Brush is ideal. These brushes, crafted with Monarch filament, deliver the perfect finish and work beautifully with both water-based and oil-based paints.

4. Create a Stunning Feature Wall

Feature walls aren’t outdated—in fact, they’re a simple way to add personality and drama to a room.

Pick a focal wall, like the one behind your bed or fireplace, and paint it in a bold shade or trendy pattern to make a statement without overwhelming your space.

To make the job easier and faster, try a paint roller cover designed for low-sheen finishes and great coverage—it’ll give you a smooth, even coat with less effort.

A well-executed feature wall can instantly update your room, making it feel stylish and inviting.

5. Boost Your Exterior Appeal

Street appeal matters, so don’t forget the outside of your home.

A fresh coat of paint on your front fence or exterior trims can work wonders. Mark O’Connor shares an inspiring example: “I visited a home recently where the transformation came down to a beautifully painted new timber fence in a light, fresh color. It completely changed the curb appeal.”

Using the right brushes—like sturdy exterior fence brushes or a quality brush pack—will help you achieve a professional finish that lasts.

If you’re unsure which tools are best for your project, Monarch’s product finder is a handy resource that guides you to the perfect painting gear for any job.

With these easy upgrades, you’ll be amazed at how quickly your home can feel refreshed, inviting, and more valuable—all with a little creativity and some quality tools in hand.

forest-green-craftsman-house-with-norwegian-fjord-decor-pine-trees-scaled-1

“From Inspiration to Address: The Historic Home That Sparked an Architect’s Dream”

A Full-Circle Journey: The Historic Home That Inspired an Architect’s Career Now Houses His Legacy

Peter Aldington may have designed only a dozen homes over the course of his storied career, but his influence stretches far beyond those few structures. His work has profoundly shaped generations of architects—none more so than British architect Gary Collins, whose own journey is deeply entwined with Aldington’s visionary designs.

It all began with a spark—just two slides, shown during a college architecture lecture, were enough to ignite something in Collins. The images depicted Turn End, a remarkable trio of houses nestled in the village of Haddenham in Buckinghamshire, England. The design spoke to him on such a deep level that he boarded a train and made a pilgrimage to the village, determined to learn more. That bold decision led to an internship at Aldington’s firm, Aldington, Craig and Collinge—a formative opportunity that would set the course for his life and career.

But Collins received more than professional mentorship from the encounter—he received an enduring inspiration that would one day become his home. Decades after that fateful visit, Collins and his wife, Sally, purchased Middle Turn, one of the three architecturally significant homes in the Turn End compound—the very property that had captivated him as a student. Since 2018, the couple has lived there, surrounded by the legacy of his mentor and the design that first drew him in.

The Turn End compound consists of three homes: The Turn, Middle Turn, and Turn End, the largest and most iconic of the trio. Aldington and his wife, Margaret, still reside in Turn End, now in their 90s, sharing the property with the Collinses and a third household renting The Turn. The three homes are connected by a shared courtyard with a covered carport, creating a quiet, cohesive community shaped by architectural intention and thoughtful design.

Turn End is more than a set of buildings; it’s a holistic vision that seamlessly blends built form with landscape. Aldington believed the outdoor environment should hold equal weight to the homes themselves—a philosophy evident in every carefully curated angle of the half-acre site. Designed as a harmonious union between architecture and garden, the compound is a living example of spatial poetry.

Aldington’s famously high standards meant that every detail of the homes was executed with care and craft. With the help of Margaret and a team of skilled local artisans, he built the homes himself over three years, completing the project in 1963. The result is a timeless expression of place and purpose, with each home exuding a quiet reverence for its materials and surroundings.

The exteriors remain largely unchanged since those early days. The walls are constructed from wychert, a traditional local building material made of white chalk, clay, and straw—sourced directly from the surrounding landscape. The roofs are covered in terracotta tiles, another nod to the vernacular architecture of the region. Turn End, in particular, has become a masterclass in blending modernist principles with village tradition.

In 1998, the Aldingtons established the Turn End Trust to preserve and share the legacy of the site. Its mission is to celebrate the seamless integration of architecture and garden design. As part of his ongoing connection to the property, Gary Collins now serves as a trustee. The Trust organizes open days, gardening classes, and creative workshops to engage the public and keep the spirit of Turn End alive.

Though the next public “Open Day” isn’t scheduled until May 2026, those eager to peek behind the wychert walls don’t have to wait. Middle Turn, Gary’s architectural dream-come-true, offers an intimate look into a space that not only inspired a career—but became the heart of a life.